
Oh, the joy of opening a dishwasher and being greeted by gleaming, spot-free dishes! But let’s face it, sometimes our trusty dishwashing companion hits a snag, and the results are less than shiny. First, know you’re not alone, and it’s perfectly okay. Every appliance, even our beloved dishwasher, needs a little tender love and care from time to time. And hey, that’s where our guide on “How to Fix a Dishwasher – Troubleshooting and Repair” steps in to save the day.
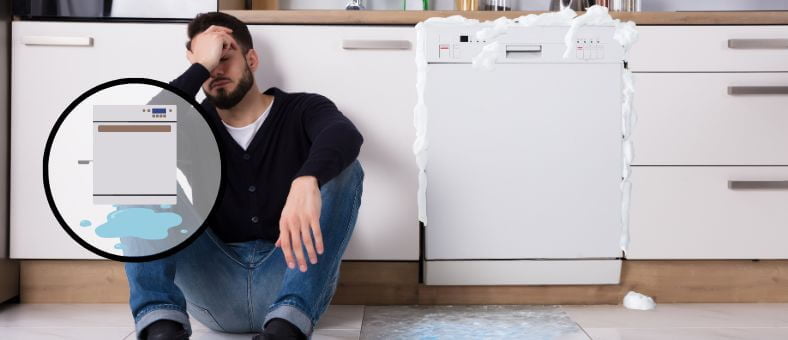
Imagine no more head-scratching moments trying to figure out why your dishes aren’t drying or why there’s that odd puddle on your kitchen floor. Our guide is tailored to break things down in a way that’s simple, fun, and (most importantly) super easy to understand. So, whether you’re a DIY enthusiast or someone who’s just tired of soggy plates, there’s something in here for everyone.
Ready to embark on this dishwashing rescue mission? Let’s roll up our sleeves and dive in. By the end of this, you’ll have a working dishwasher and a newfound appreciation for it. Stick with us, and let’s bring your dishes back to life.
Fix Your Dishwashers and Save Time!
Did you know? The average person spends 230 hours every year washing dishes by hand. Dishwashers cut that time by 60%! Fixing yours means more free time for fun.
Additionally, the EPA highlights how modern dishwashers conserve water compared to hand washing. Check out their water-saving statistics.
Table of Contents
Dishwasher Basics: How It Works
- Loading: Fill the dishwasher with dirty dishes, utensils, and cookware, ensuring they are correctly positioned for optimal cleaning.
- Water Intake: Once started, the dishwasher draws water from your home’s supply, which is heated to the necessary temperature.
- Detergent Dispensing: The dispenser opens at the right moment during the cycle to release the soap, which mixes with the hot water.
- Cleaning: Spray arms strategically shoot water and detergent onto the dishes, breaking down and removing food residue.
- Draining: Dirty water drains from the dishwasher, and the cycle repeats as necessary.
- Rinse and Dry: After cleaning, dishes are rinsed with fresh water, and a heating element facilitates drying.
Majority Have Dishwasher Woes!
Join the club! 68% of households face dishwasher problems yearly. But with this guide, you’re set to tackle them head-on and stay ahead of the game!
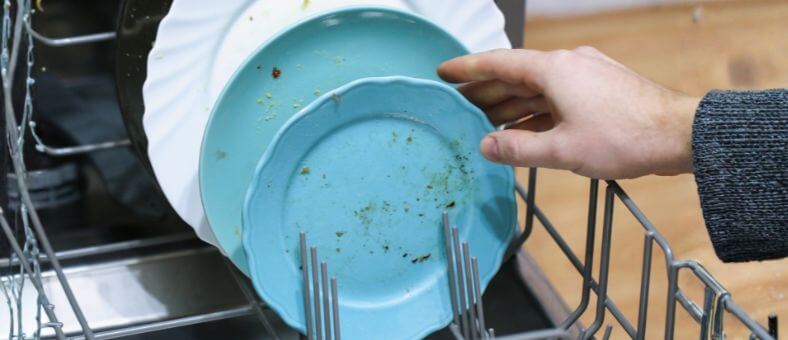
Problem 1: Your dishes don’t come out clean
Check water temperature and adjust settings
Checking the water temperature could be your first step toward a solution. Your dishwasher must reach an optimal temperature, usually around 120°F, for effective cleaning. If your dishwasher falls short of this, adjusting your water heater settings may be necessary. Always handle such adjustments carefully, referring to your user manual or consulting a professional if you are unsure.
Discover how your dishwasher utilizes hot water and what the ideal temperature is in our guide on dishwasher hot water usage.
Use a dishwasher cleaner to remove buildup
Sometimes, the issue of not-so-clean dishes can be attributed to buildup inside the dishwasher. Mineral deposits, food debris, or detergent residues can interfere with the effectiveness of your dishwasher. A dedicated dishwasher cleaner can work wonders here. By running a wash cycle with this cleaner (without any dishes), you can help your dishwasher reclaim its full cleaning potential. Always follow the instructions provided with the cleaner for maximum efficacy.
For recommendations on the most effective products, check out our guide on The Best Dishwasher Cleaners.
Inspect and clean spray arms
One critical aspect of ensuring sparkling dishes is regularly inspecting and cleaning your dishwasher’s spray arms. Over time, tiny food particles can accumulate in the holes of the spray arms, which can affect their efficiency. Make it a point to check these parts periodically and, if necessary, use a small brush or toothpick to remove any blockages. This simple step can dramatically improve your dishwasher’s performance.
For a detailed guide on how to properly clean your dishwasher spray arms, check out our article on How to Clean Dishwasher Spray Arms.
Ensure proper loading techniques
Organizing your dishware is crucial so water and detergent can reach all surfaces. Avoid nesting dishes too closely or blocking the spray arms with large items. With proper loading techniques, you’ll set your dishwasher up for success and ensure each cycle brings spotless results.
For more tips on how to maximize the effectiveness of your dishwasher through proper loading, check out our comprehensive guide on How to Load Your Dishwasher Properly.
Check water inlet valve for clogs or damage
The water inlet valve is a key component in dishwashing, allowing your machine to fill with the necessary amount. If your dishes need to come out clean, it may be due to a clogged or damaged water inlet valve. Ensure the valve is in good working order and free of any obstructions. If damaged, consider replacing it for optimal dishwashing results.
Hand-Cranked Times!
Can you imagine? Before the 1920s, dishwashers were hand-powered! So, if yours is acting up, remember – at least there’s no hand-cranking involved!
Problem 2: Water pools on the floor—dishwasher door leaks
Inspect door gasket for wear or damage
Water pooling on your kitchen floor could indicate a leaking dishwasher door, often caused by a worn or damaged door gasket. This rubber or vinyl seal prevents water from escaping during the wash cycle. Check the gasket for any signs of wear, damage, or deformities. If you see any, it might be time to replace the gasket to ensure a secure, watertight seal.
Clean door gasket and ensure proper alignment
Sometimes, your dishwasher door leaks simply because the gasket is dirty or misaligned. Food debris and residue can build up on the gasket, affecting its ability to form a tight seal. Regularly cleaning it with mild soap and a soft cloth can keep it functioning well. Also, ensure that the gasket is aligned correctly around the door. If it has come loose, push it back into place. If it is misshapen or damaged, you may need to replace it.
Check for loose or damaged door hinges
Loose or damaged hinges can prevent the door from closing correctly, leading to leaks. Make sure the door is locked evenly and securely. If you notice any movement in the hinges, try tightening them. If they are damaged or bent, you may need to replace them to restore your dishwasher’s leak-free operation.
Clean and unclog the drain hose
A dishwasher door leaking could also signal a blocked drain hose. This hose at the back of the dishwasher carries the dirty water out of your appliance. Water can back up and seep out from the dishwasher door if it’s clogged. Disconnect the hose carefully and rinse it out with warm water. You may need a flexible brush or a straightened wire hanger to clear the blockage for stubborn clogs. Once cleaned and unclogged, reattach the hose and check if the leak persists.
Verify proper leveling of the dishwasher
An unevenly positioned dishwasher can also lead to water pooling on the floor. The appliance should be level to ensure proper water circulation and drainage. You can use a spirit level to ensure your dishwasher is aligned correctly. If it’s tilting, adjust the feet at the bottom or add shims until level. Remember, a perfectly leveled dishwasher prevents leaks and optimizes machine performance.
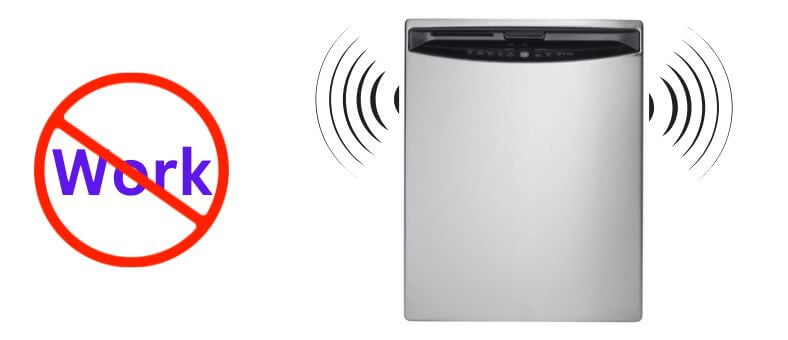
Problem 3: Dishwasher hums but no water and doesn’t start
Check water supply and ensure it is turned on
A dishwasher that hums but doesn’t start could face an issue with the water supply. Make sure the water supply to your dishwasher is turned on. You can usually find the supply valve under your kitchen sink. Turn it clockwise to ensure it’s fully open. If the valve is turned on and the problem persists, there might be a blockage in the supply line, which needs to be cleared or replaced. Remember, with an adequate water supply, your dishwasher can operate correctly.
Inspect water inlet valve for clogs or malfunctions
Another potential cause of your dishwasher humming but not starting could be the water inlet valve. The water flow into the dishwasher is controlled by this valve. If it’s clogged or malfunctioning, your dishwasher might not get the needed water. You can locate the valve at the bottom of the dishwasher behind the front access panel. It’s advised to call in a professional to inspect and clean this part to avoid causing more damage.
Test and reset the dishwasher’s electrical connections
Your dishwasher’s issue might not be water-related—it could be an electrical problem. If your dishwasher hums but doesn’t start, it’s worth checking the electrical connections. Ensure the dishwasher is correctly connected to the power source and check for tripped circuit breakers or blown fuses. Also, if your dishwasher has a reset feature (commonly found in newer models), utilize that function according to your manufacturer’s instructions. Remember, always prioritize safety when working with electricity. It’s best to consult a professional electrician or certified appliance repair technician if unsure.
Verify the door is fully closed and latched
It might seem obvious, but sometimes the simplest solutions are the easiest to overlook. If your dishwasher hums but doesn’t start, it could be that the door isn’t fully closed or latched. Most dishwashers have safety features that prevent them from operating unless the door is securely closed. So, check the door latch for any damages and make sure the door closes and locks correctly. A minor adjustment or latch replacement might be needed to keep your dishwasher running.
Check for error codes and consult the user manual
If your dishwasher still needs to start, it might give you a clue why. Many modern dishwashers display error codes when something goes wrong. These codes usually combine letters and numbers displayed on the control panel. If you notice an error code, grab your user manual or look up the code online. Understanding what these codes mean can help you identify the issue and guide you toward the proper fix, potentially saving you time, stress, and even a few bucks.
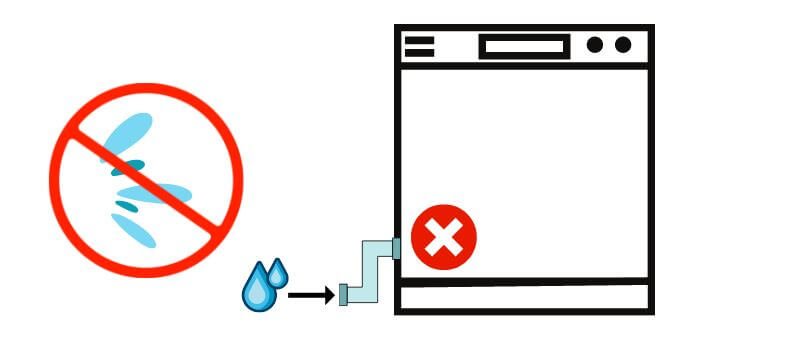
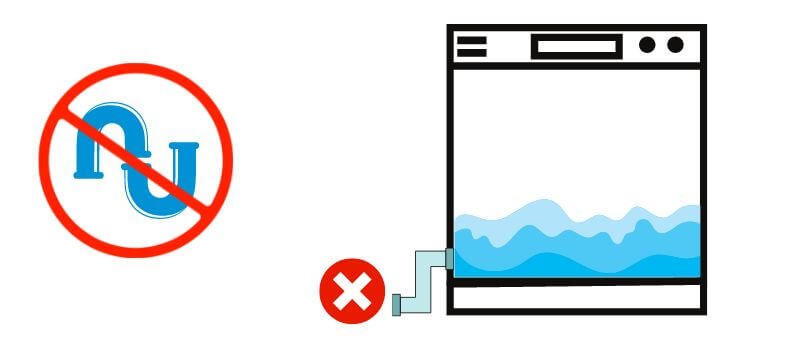
Problem 4: Dishwasher doesn’t fill with water
Check water supply valve and ensure it is fully open
If your dishwasher isn’t filling up with water, your water supply could be the culprit. The supply valve is typically under the sink and controls water flow into your dishwasher. Ensure this valve is in the open position. A partially closed valve can restrict water flow, preventing your dishwasher from filling correctly. A quick adjustment to open the valve could be the simple solution to get your dishwasher back in action.
Inspect water inlet valve for clogs or malfunction
Another possible reason for your dishwasher not filling with water could be a malfunctioning or clogged water inlet valve. This valve allows water from your home’s plumbing to enter the dishwasher. If it’s clogged or broken, it could prevent water from filling the dishwasher. Unplug your dishwasher and inspect the valve for any signs of damage or clogs. Cleaning or replacing a faulty water inlet valve can help restore your dishwasher’s performance.
Clean the dishwasher’s float switch
The float switch in your dishwasher regulates the amount of water that fills the appliance. If this switch is stuck or grimy, it could send the wrong signal to your dishwasher, causing it not to fill. Ensure your dishwasher is turned off and unplugged, then locate the float switch (usually found at the bottom of the dishwasher tub). Gently clean the float switch to remove any debris or buildup causing it to stick. Once cleaned, your dishwasher should fill with water as expected.
Test and reset the dishwasher’s electrical connections
Electrical issues can also interfere with your dishwasher’s ability to fill with water. Ensure your dishwasher is unplugged, then check for loose or corroded wires, especially those connected to the water inlet valve. If everything looks okay, but your dishwasher still won’t fill, you might try resetting the dishwasher. Unplug it or turn off the circuit breaker for about a minute, then restore power. This can sometimes reset the system and solve the problem. If the issue persists, it might be time to call in a professional.
Verify the water pressure in the home’s plumbing system
If your dishwasher is not filling, it may be due to low water pressure in your home’s plumbing system. Check other water sources in your home, like sinks and showers, to see if they are also experiencing low pressure. You may need to address this issue with your water provider or a professional plumber if they are. Dishwashers typically require a water pressure between 20-120 PSI to operate effectively. If water pressure is not the issue, consider the other troubleshooting steps or seek professional help.
Interested in plumbing systems? Check out the role of water pressure in plumbing and how to regulate it.
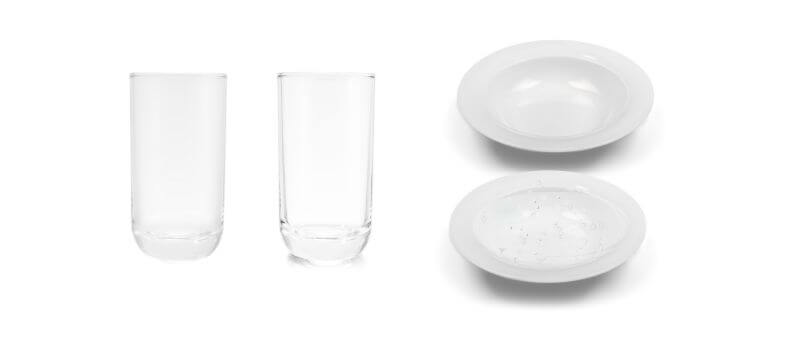
Problem 5: Dishwasher leaves spots or film on dishes
Ensure proper rinse aid usage
Rinse aid is vital in eliminating spots and film from your dishes. It works by decreasing the surface tension of water, helping it slide off your dishes efficiently during the rinse cycle, and speeding up the drying process. If your dishwasher leaves spots or film on dishes, check the rinse aid dispenser and ensure it’s filled and dispensed correctly. Additionally, adjust the rinse aid dispenser settings if your dishwasher allows it. For recommendations on the most effective products, check out our guide on The Best Dishwasher Rinse Aid.
Check water temperature and adjust settings
If the water isn’t hot enough, it may not effectively dissolve detergent or remove grime, leading to spots or film on your dishes. Check your water heater settings and ensure the temperature is between 120-150 degrees Fahrenheit. If it’s lower, consider increasing the temperature. However, remember to be careful when adjusting the water heater settings to avoid the risk of scalding. If your dishwasher has a ‘high temperature’ or ‘sanitary’ cycle, you may also use this feature for better results.
Clean and descale the dishwasher’s interior
Scale buildup from hard water can hinder your dishwasher’s performance, potentially leaving spots or film on your dishes. Regularly cleaning and descaling your dishwasher can help rectify this issue. Several dishwasher-safe descaling products are available on the market that can easily be used for this purpose. Follow the manufacturer’s instructions and run the dishwasher empty with the descaler. This simple maintenance step can significantly improve your dishwasher’s cleaning performance, leaving you with spotless, film-free dishes.
Explore our comprehensive guide for descaling and refreshing your appliance.
Inspect and clean the dishwasher’s filter
A clogged or dirty filter could be the culprit behind your dishes not coming out spotless. It’s essential to regularly check and clean your dishwasher’s filter to ensure it doesn’t hinder your appliance’s performance. A simple rinse under hot water and a gentle scrubbing with a soft brush can do wonders in maintaining the filter’s effectiveness. Regularly cleaning the filter improves washing quality and extends the life of your dishwasher.
Use a dishwasher cleaner to remove mineral deposits
Mineral deposits, often resulting from hard water, can leave unsightly spots on your dishes. These deposits can also accumulate in your dishwasher, diminishing its performance. Consider using a dishwasher cleaner specifically designed to remove mineral buildup to combat this issue. This will help improve your dishwasher’s overall effectiveness and keep your dishes looking their best.
Learn more about dishwasher problems caused by hard water and discover practical solutions to address the issue.
Problem 6: Dishwasher produces strange noises during operation
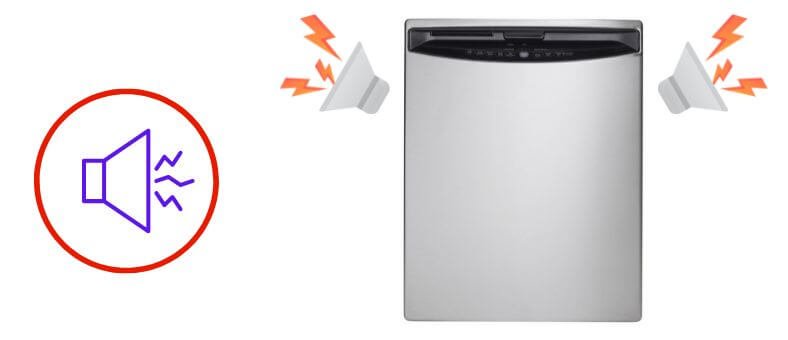
Check for loose or damaged dishwasher components
If your dishwasher makes unusual noises, it could be due to loose or damaged components. Start by inspecting the spray arms, the dishwasher rack, and the utensil holder for any loose parts rattling during operation. Also, ensure that dishes are loaded correctly and not knocked against each other. Suppose all the components seem secure and in place, but the noise continues. In that case, consulting a professional for further investigation might be a good idea. Preventative measures and early detection of potential issues can ensure longer appliance life and better performance.
Inspect spray arms for obstructions or damage
A common cause of strange noises in your dishwasher could be the spray arms. Sometimes, pieces of food or other debris can become lodged in the spray holes, causing a disruption in the water flow and creating unusual sounds. Carefully inspect the spray arms and remove any visible obstructions. In addition, check for any signs of damage. If the spray arms are cracked or broken, they may need to be replaced. If the spray arms work correctly, the dishwasher gives you an effective and quiet operation.
Tighten or replace loose dishwasher racks or holders
The metallic clatter from your dishwasher may come from something as simple as loose racks or holders. Over time, these components can become worn and may start to rattle during the wash cycle. Take a moment to inspect the racks and utensil holders in your dishwasher. Tighten any loose screws or fittings and replace any excessively worn or damaged parts. Keeping your dishwasher racks secure and in good condition helps to maintain a quiet and efficient operation.
Clean the dishwasher’s filter and drain pump
Dishwashers need regular maintenance, and a common source of unexpected noise could be a clogged filter or drain pump. Food particles and other debris can accumulate and harden as time passes, causing strange noises when your dishwasher operates. Regularly inspecting and cleaning your dishwasher’s filter and drain pump can alleviate this problem. By doing so, you not only silence the noise but also boost the performance and longevity of your appliance. Remember, a clean dishwasher is a happy (and quiet) dishwasher.
Verify proper leveling and alignment of the dishwasher
A dishwasher that’s not level or misaligned could be the culprit behind those strange noises. Ensuring your dishwasher is level for optimal performance and noise reduction is important. Most dishwashers have leveling legs or wheels that can be adjusted manually. If your dishwasher is tilted or uneven, adjust these accordingly. For alignment issues, make sure the dishwasher fits snugly in its designated space without leaning against cabinets or other appliances. With a level and well-aligned dishwasher, you can say goodbye to those unwelcome noises and hello to smooth, silent operation.
This video demonstrates how to properly level your dishwasher to prevent operational noise.
Problem 7: Dishwasher door won’t latch or close properly
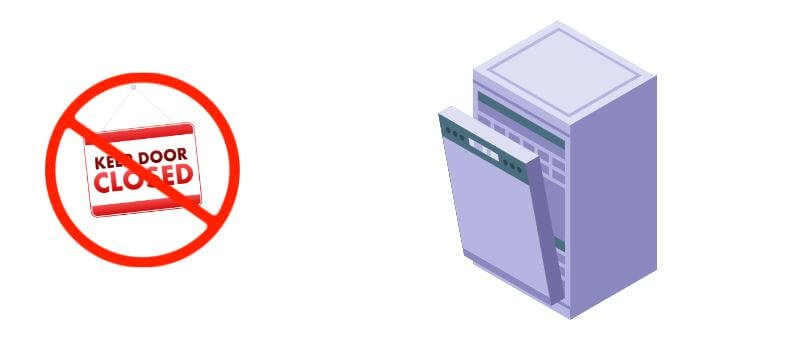
Check for obstructions blocking the door or latch mechanism
If your dishwasher door doesn’t latch or close properly, the issue could be as simple as an obstruction. Inspect the door and latch area for anything causing the problem—a utensil, a piece of dishware, or even accumulated grime. A misaligned dish rack or a large dish could also prevent the door from closing. Carefully remove any blockages, and rearrange your dishes if needed. Once the pathway is clear, your dishwasher door should be able to latch securely for a proper washing cycle.
Inspect and adjust the door latch and strike plate
Your dishwasher’s latch mechanism is crucial in keeping the door securely closed. If it’s not working correctly, your dishwasher door may refuse to shut. Look at the latch and the strike plate (where the latch catches) misaligned or damaged. Sometimes, a simple adjustment or realignment can solve the problem. If there’s noticeable damage, you may need to replace these components.
Clean and lubricate the door hinges
Door hinges may become stiff or squeaky over time, potentially preventing your dishwasher door from closing correctly. First, clean the hinges of any accumulated grime using a cloth or soft brush to address this. Next, apply a lubricant suitable for kitchen appliances to ensure smooth movement. This regular maintenance can help prolong the life of your dishwasher’s hinges and prevent issues with the door closing.
Replace a worn or damaged door latch or door seal
With continuous usage, your dishwasher’s door latch or door seal may wear out or become damaged, making it difficult for the door to latch properly. If cleaning or realigning the latch doesn’t resolve the issue, it might be time to replace it. Similarly, a deteriorated door seal can lead to leaks and improper closing. Both parts are readily available and can be replaced with basic tools and patience.
Verify proper alignment of the dishwasher door
A misaligned door may not latch properly, causing the dishwasher to malfunction or leak. First, ensure the dishwasher is level to rectify this – an uneven floor could cause alignment issues. Then, check the door hinges for any signs of damage or wear. If the door still doesn’t close correctly, consider calling a professional, as the issue may be more complex, such as a misaligned tub or damaged door hinges.
Problem 8: Dishwasher fails to drain water completely
Clean and unclog the dishwasher’s filter and drain pump
A common reason a dishwasher fails to drain completely is a clogged filter or drain pump. Over time, food residue can accumulate and obstruct the filter or pump, hindering the water drainage process. To resolve this, locate your dishwasher’s filter – usually found at the bottom – and clean it thoroughly, removing debris. Similarly, the drain pump might need attention. Always make sure to unplug your dishwasher before starting this task.
Check the drain hose for kinks or clogs
A kinked or clogged drain hose could also prevent your dishwasher from draining correctly. Examine the hose for any visible kinks, bends, or blockages. If you spot a kink, try to straighten the hose. If a blockage is suspected, you should disconnect the hose and clean it out. Make sure the dishwasher is turned off and unplugged before doing this. If the hose is damaged or the problem persists, consider replacing the hose or seeking professional help.
Test and reset the dishwasher’s drain pump
The dishwasher’s drain pump could also be at fault if the appliance isn’t draining correctly. You can test the pump’s functionality using your dishwasher’s diagnostic mode (refer to your user manual for specific instructions). It might need to reset if the pump is functioning, but the dishwasher still won’t drain. This process varies by model but often involves unplugging the dishwasher briefly before restarting it. If these steps don’t resolve the issue, the pump may need repair or replacement, which a professional should do.
Verify proper installation of the drain hose
Your dishwasher’s drain hose must be installed correctly to ensure efficient water drainage. It should be secured above the dishwasher’s water level to prevent backflow. Additionally, the hose should be kept from being kinked or pinched, as this could obstruct water flow. Correct positioning of the drain hose can enhance your dishwasher’s performance and prevent clogging issues during draining. For a comprehensive guide on how to properly install or replace your dishwasher and ensure optimal setup, including the drain hose, check out our article on How to Install or Replace a Dishwasher.
Additionally, for optimal results, consider using high-quality installation kits, as recommended in our article on the Best Dishwasher Installation Kits.
Inspect the air gap or garbage disposal connection
The air gap or garbage disposal connection can sometimes be a source of drainage problems. If your dishwasher uses an air gap, usually on the countertop near the sink, ensure it’s not clogged. Verify that the knockout plug was removed during installation for systems connected to garbage disposal. Both issues can restrict water flow, leading to incomplete draining. If you detect any clogs or incorrect installations, rectify them promptly to restore your dishwasher’s optimal draining capacity.
Problem 9: Dishwasher doesn’t dispense detergent properly
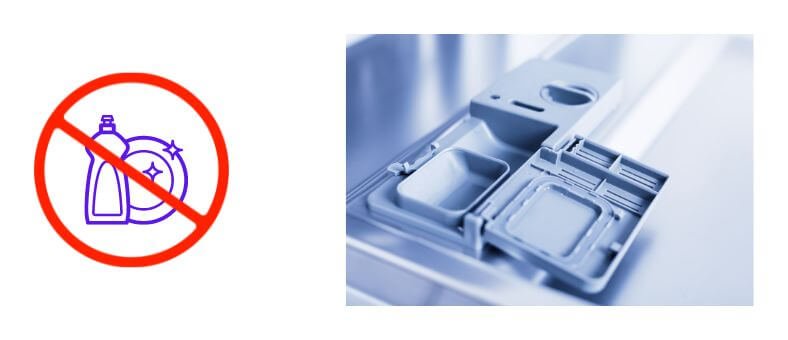
Clean the detergent dispenser compartment
A dirty or clogged detergent dispenser can hinder your dishwasher’s ability to effectively dispense detergent. Over time, residue can build up, causing the dispenser door to stick or fail to open completely during the wash cycle. This can lead to subpar cleaning results. To solve this, remove any visible detergent residue from the dispenser compartment using a soft cloth and warm, soapy water. Regular cleaning of the detergent dispenser can help ensure that your dishwasher operates at its best, delivering sparkling clean dishes every time.
Check for obstructions blocking the dispenser door
Suppose you overload the dishwasher or arrange the dishware poorly. In that case, the detergent dispenser door may not open completely due to obstructions. If the detergent can’t dispense properly, your dishes may not get cleaned effectively. Regularly ensure that dishware or cutlery is not blocking the dispenser door. Arrange items correctly according to the dishwasher’s manual to allow all components to function without obstruction. By ensuring proper loading, you can provide your dishwasher’s detergent dispenser operates without hindrance, leading to cleaner dishes and a more efficient wash cycle.
Adjust the amount of detergent used per cycle
Finding the right amount of detergent in your dishwasher is essential for optimal cleaning performance. Too much detergent can result in residue buildup and even leave a film on your dishes. On the other hand, using less detergent may not effectively clean your dishes. Adjusting the amount of detergent used per cycle can help ensure that your dishwasher dispenses the right amount for each load. Refer to the detergent manufacturer’s instructions and experiment with different amounts to find the perfect balance. By fine-tuning the detergent dosage, you’ll achieve sparkling clean dishes and maximize the efficiency of your dishwasher.
Ensure proper loading techniques to prevent blockage
Improper loading of dishes can inadvertently block the detergent dispenser, preventing it from adequately releasing detergent during the wash cycle. To avoid this issue, ensure that dishes, utensils, and other items are loaded to allow unobstructed access to the dispenser. Avoid overloading the dishwasher and ensure that things are spaced out correctly to allow for proper water flow and detergent distribution. By following proper loading techniques, you can prevent blockage and ensure that your dishwasher dispenses detergent effectively, resulting in spotless dishes every time.
Test the dispenser’s solenoid or motor for malfunctions
These components are responsible for releasing the detergent at the right time during the wash cycle. To test the dispenser’s solenoid or motor, consult the dishwasher’s manual for instructions on accessing and testing these parts. If you suspect a malfunction, it may be necessary to replace the faulty component. You can effectively dispense detergent and achieve optimal cleaning results by ensuring the dispenser’s solenoid or motor is in good working condition.
Problem 10: Dishwasher won’t dry dishes effectively
Ensure rinse aid dispenser is filled and adjusted correctly
Rinse aid plays a crucial role in effectively drying dishes in your dishwasher. It helps to reduce water spots and improve drying performance. To address the dish drying problem, check that the rinse aid dispenser is filled and adjusted correctly. Follow the manufacturer’s instructions to determine the appropriate rinse aid level for your dishwasher model. Adjust the dispenser settings if necessary to ensure the right amount of rinse aid is released during the wash cycle.
Check the heating element for damage or malfunctions
The heating element in your dishwasher provides the necessary heat to dry your dishes effectively. If your dishes are not drying properly, you must check the heating element for any signs of damage or malfunctions. Inspect the piece for any visible damage, such as cracks or breaks. Testing the component using a multimeter or consulting a technician may be necessary if you suspect a malfunction. A faulty heating element can hinder drying and result in damp dishes. By ensuring that the heating element is in good working condition, you can promote efficient drying and enjoy dehydrated dishes after each wash cycle.
Use a higher temperature setting for better drying results
One possible solution to improve drying results in your dishwasher is to use a higher temperature setting. Some dishwasher models offer different temperature options for the wash and dry cycles. By selecting a higher temperature setting for the drying phase, you can enhance the drying process and achieve better results. The increased heat helps to evaporate moisture more effectively, leaving your dishes dry and ready to be put away. Refer to your dishwasher’s user manual to learn how to adjust the temperature settings accordingly. With the right temperature setting, you can ensure that your dishes come out perfectly dry and ready to be used or stored.
Arrange dishes properly to allow for adequate airflow
Make sure to space out your dishes and avoid overcrowding, which can hinder hot air circulation within the dishwasher. By providing enough space between items, you allow the hot air to reach all surfaces of the dishes, promoting faster and more efficient drying. Additionally, ensure that dishes are positioned in a way that water can quickly drain off them, such as placing them at an angle or facing downwards. Properly arranged dishes will optimize the airflow and result in better drying performance.
Clean and descale the dishwasher’s interior
A buildup of limescale and mineral deposits can hinder the drying performance of your dishwasher. It’s important to clean and descale the interior of your dishwasher regularly. Start by removing any food debris or residue from the dishwasher’s interior, including the walls, racks, and spray arms. Then, using a dishwasher cleaner or a mixture of vinegar and water, run a cleaning cycle to break down and remove limescale and mineral buildup. This will help restore the efficiency of the heating element and ensure proper heat distribution for effective drying.
Problem 11: Dishwasher displays error codes or malfunctions
Refer to the dishwasher’s user manual for error code explanations
When your dishwasher displays error codes or malfunctions, it’s essential to consult the user manual provided by the manufacturer. Error codes help identify specific issues or malfunctions in the dishwasher’s operation. By referring to the user manual, you can find detailed explanations of each error code and the recommended actions to resolve them. The manual will provide step-by-step instructions on troubleshooting and potentially fixing the problem yourself.
Test and reset the dishwasher’s electrical connections
When your dishwasher displays error codes or malfunctions, it could be due to electrical issues. Start by turning off the dishwasher and unplugging it from the power source. Carefully examine the electrical connections, including the dishwasher’s power cord, plug, and wiring. Ensure that all connections are secure and free from damage. If you notice any loose or damaged connections, tighten or replace them if necessary. Once the electrical connections are checked, plug the dishwasher back in and test its operation. Reset the dishwasher by following the instructions in the user manual, if applicable. This troubleshooting step can often resolve electrical problems and get your dishwasher back on track.
Check for clogs or malfunctions in specific components
When your dishwasher displays error codes or malfunctions, check for clogs or malfunctions in specific components. Start by inspecting the dishwasher’s filter, drain pump, and spray arms for any debris or blockages. Clean them thoroughly to ensure proper water flow and spray. Additionally, check the water inlet valve and float switch for any obstructions or malfunctions. These components are crucial in regulating water flow and detecting water levels inside the dishwasher. Clearing clogs or addressing these components’ malfunctions can often resolve error codes and restore your dishwasher’s functionality.
Contact the manufacturer or a professional for further assistance
If you have followed the troubleshooting steps and the error codes or malfunctions persist, it may be time to seek further assistance. Contacting the dishwasher manufacturer or a professional appliance repair service can provide expert guidance and support. They have the knowledge and experience to diagnose and resolve complex issues that may require specialized tools or replacement parts. Feel free to contact them for assistance, as they can provide valuable insights and ensure your dishwasher is functioning optimally.
Perform a hard reset by turning off the dishwasher’s power
Sometimes, a simple reset can resolve error codes or malfunctions in your dishwasher. To perform a hard reset:
- Start by turning off the dishwasher’s power at the circuit breaker or unplugging it from the power source.
- Leave it powered off for about 5-10 minutes to allow any residual energy to dissipate.
- After the waiting period, restore power to the dishwasher and turn it back on.
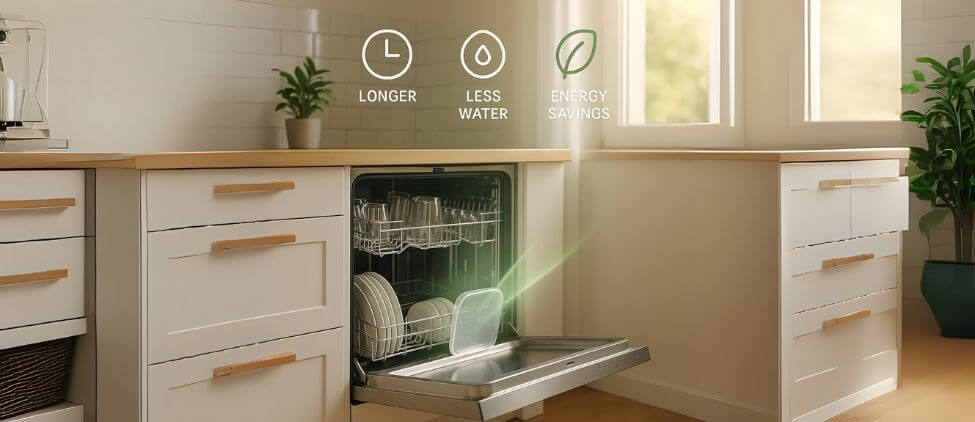
Dishwasher Energy-Saving Tips
We all appreciate the convenience and efficiency that dishwashers bring to our daily lives, but have you ever considered the energy consumption associated with this essential kitchen appliance? By adopting a few simple practices, you can make your dishwasher more energy-efficient and reduce its environmental impact while saving on your energy bills. In this article, we will explore practical tips and techniques to maximize the energy-saving potential of your dishwasher. From optimizing load sizes to selecting energy-efficient cycles, we’ll empower you to make greener choices without compromising cleanliness. Let’s embark on this journey towards a more sustainable and cost-effective dishwashing routine.
Want to dig deeper into how much energy your dishwasher really uses? Check out our guide on How Much Electricity Does a Dishwasher Use?
Load the Dishwasher Efficiently:
- Arrange dishes so they do not block spray arms, allowing for proper water circulation.
- Avoid overcrowding to ensure effective cleaning and drying.
- Use all the racks and compartments efficiently for optimal energy use and clean results.
Choose Energy-Efficient Dishwashing Cycles:
- Select shorter, energy-saving cycles like eco or light to reduce energy consumption.
- Use the “air dry” feature instead of heated drying to conserve more energy.
Optimize Water Temperature Settings:
- Adjust water temperature settings to about 120°F (49°C) for effective cleaning without excessive energy use.
- Lower water temperature settings as recommended by your dishwasher’s manual to save energy.
Skip Pre-Rinsing Dishes:
- Modern dishwashers are designed to handle food residue, making pre-rinsing often unnecessary. Explore Pre-rinsing dishes – dishwasher myths and learn why skipping the rinse might actually be better.
- Scrape off excess food from dishes and load them directly to save water and energy.
Use the Dishwasher’s Eco Mode:
- Utilize the eco mode or energy-saving setting for daily washes to minimize energy and water usage.
- Eco modes maintain cleaning effectiveness while reducing environmental impact.
Maintain the Dishwasher Regularly:
- Clean the filter and spray arms regularly to prevent performance issues due to debris or mineral buildup.
- Check and replace the door gasket if damaged to ensure a proper seal.
- Ensure water inlet and drain hoses are free from clogs or obstructions.
Final Thoughts on How to Fix a Dishwasher
Dishwashers are like magic boxes—put in dirty dishes, and voilà! Clean ones appear. But even magic has its hiccups. From dishes remaining dirty to noisy operations, we’ve dived deep into all the common problems and how to fix a dishwasher. Remember, your handy dishwasher deserves some love and care too. So, next time it throws a tantrum, you’ll know just what to do. And hey, if tinkering isn’t your thing, it might be time to treat yourself to a brand-new one. After all, a happy kitchen is the heart of a joyful home. Go on, make your dish-cleaning dreams come true!
At WashDryDazzle, our primary goal is to equip you with invaluable knowledge to simplify your day-to-day tasks; to explore more, check out our central hub of Dishwasher Guides.
Frequently Asked Questions (FAQs)
What does “troubleshooting” mean for my dishwasher?
Troubleshooting is like being a detective for your dishwasher. It’s figuring out what’s wrong by looking at clues or signs.
Do I always need a professional to fix my dishwasher?
Only sometimes! Some problems are easy to fix on your own. But if it seems complex or risky, it’s safer to call an expert.
Is it expensive to repair a dishwasher?
It depends on the problem. Some fixes are cheap, like cleaning a filter. But if a big part breaks, it might cost more.
How do I know if my dishwasher needs fixing?
If it doesn’t work like it used to, like leaving dirty dishes or making weird noises, it might need some fixing.
Can I prevent problems with my dishwasher?
Yes! Regularly cleaning it and checking parts can help. And always read the user manual for best practices.
Is it better to repair or replace my dishwasher?
If it’s old and breaks often, consider a new one. But a repair can save money if it’s just a small issue.
Why is “repair” important for a dishwasher?
Repairing helps your dishwasher work better and longer. It can also save money compared to buying a new one.
Are there any tools I need for dishwasher repair?
Basic tools like screwdrivers might help. But always check what you need first, and turn off the power to be safe!
What if I can’t find the problem with my dishwasher?
It’s okay! Sometimes problems hide. You can always check online guides, ask a friend, or call an expert.